
Read more of the gripping tale below:
Fixing my skipped stitches
Ever since I took my machine apart to service it, it's been a little funny about skipping stitches. Not during normal sewing, only during special tasks that demand super-precision like free motion quilting. I refuse to believe I have broken it (you can't break something by just cleaning and oiling it without taking any critical mechanism apart). When I google "skipped stitches", you get the normal stuff like "change the needle" or "change the tension" and that just doesn't cut it with my problem - I've fully explored the parameter space of bobbins, needles, tension, stitch length, the works.
I was about to chuck it out of the window last night when my machine started skipping stitches with a twin needle, but just on the left-hand needle. Fortunately my husband has more patience and we ate some toast and trouble-shot together.
 |
| Twin needle stitching with left needle skipping (teal thread) and right needle working (pale thread). |
 |
| Underside of twin-needle stitching. It's supposed to be a zig-zag all the way along. |
The skipped stitches are so intermittent and specific that it probably wasn't a serious timing issue. We hypothesise that the hook doesn't always rotate fully round inside the hook-race in my knackered machine, and therefore doesn't always reach far back enough to grab the thread from the left-most needle of the twin (which was the one which was skipping). However, this behaviour is only sporadic and so caused by friction or something.
We took the hook-race apart and fully cleaned it and inspected the surfaces. They're all a bit scratched and diveted after many years of broken needles. Super-husband brought out the Brasso and we polished the all the parts until they were shiny and smooth. I added a drop of oil inside the race circumference, even though the threads whizz near there.
Behold: this is the bottom of my front-loading machine before you take it apart:

After removing the front plate and the shuttle race/hook, you're left with this cavern which you ought to polish and oil as shown:

These are the bits you remove. Check the hook isn't damaged in any way:

Polish the surfaces shown here:

Hooray! The skipped stitches almost disappear! The moral of the story is:
If you have skipped stitches when using a twin needle or free-motion, and you've tried everything else, next try polishing the hook and hook-race.
I just bought some fine grit emery cloth for £5 to polish the hook a bit more. That's the first bit of actual money I've spent on servicing Able Mabel.
Fixing my walking foot
Having fixed my twin needle problem, I installed my generic walking foot which set me back about £5 from China (yay for Ebay). I was merrily half-way round a sleeve hem when calamity struck: I noticed the left needle was almost missing the hole in my walking foot and would surely snap any moment!
I have several issues with this foot because it's badly made. It turns out your £30 on the branded foot probably buys you a whole lot of actual engineering. However, I own some pliers and a screwdriver, and soon I'll be buying some needle files.
The photos here are post-fixing, so you can't actually see the problems I had. However, I've tried to annotate to show you, and you'll have to imagine the scale of the horrors.
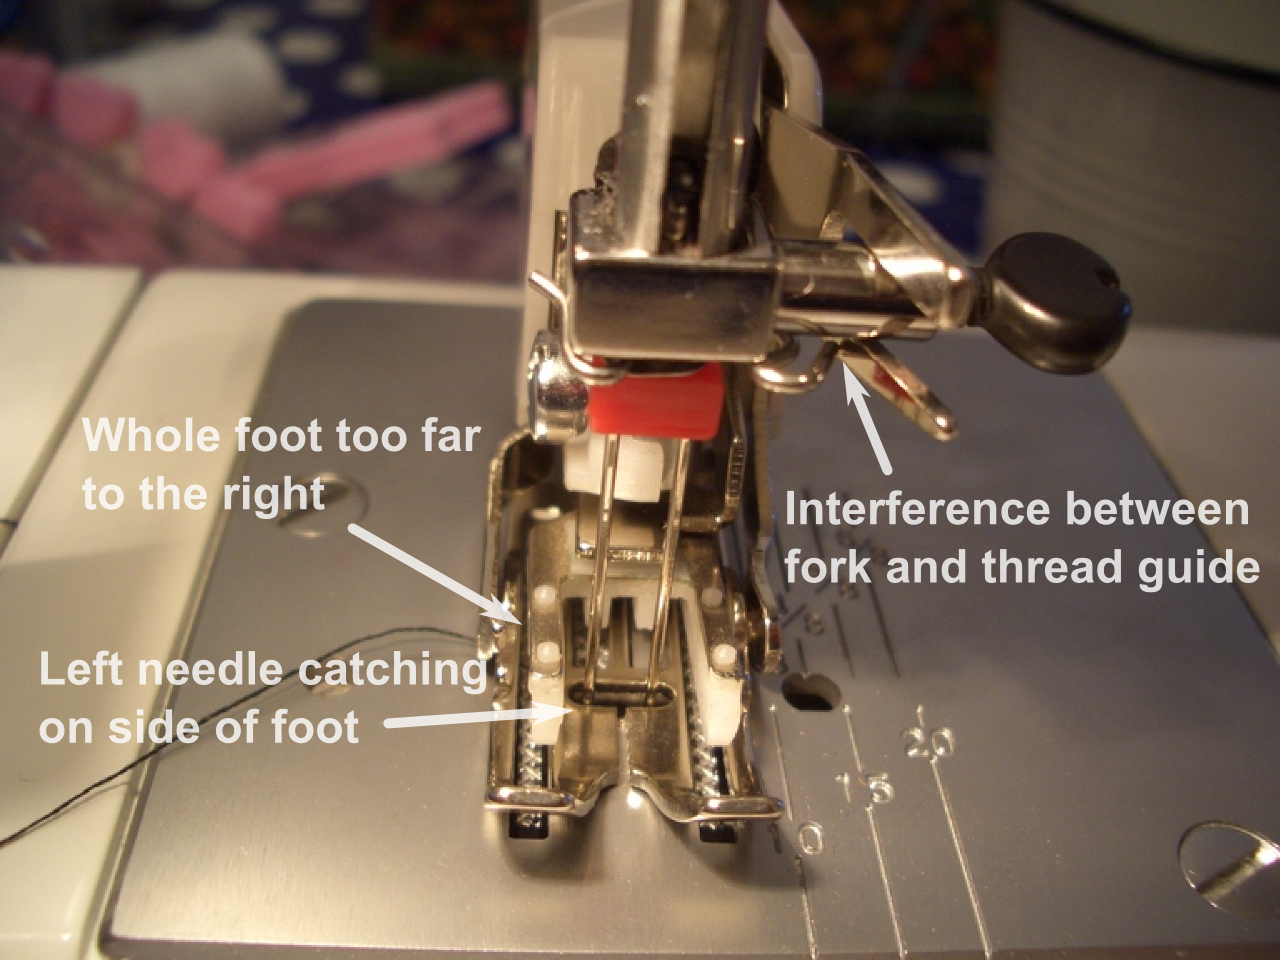
Firstly, the fork-thingy which hooks over the needle clamp to actuate the foot was interfering with a thread guide. In order to install it, I ended up skewing the whole foot to the right which caused some of my needle-bash issues. This is where you use pliers to bend the prongs to some crazy angle to give enough clearance to install the foot straight.
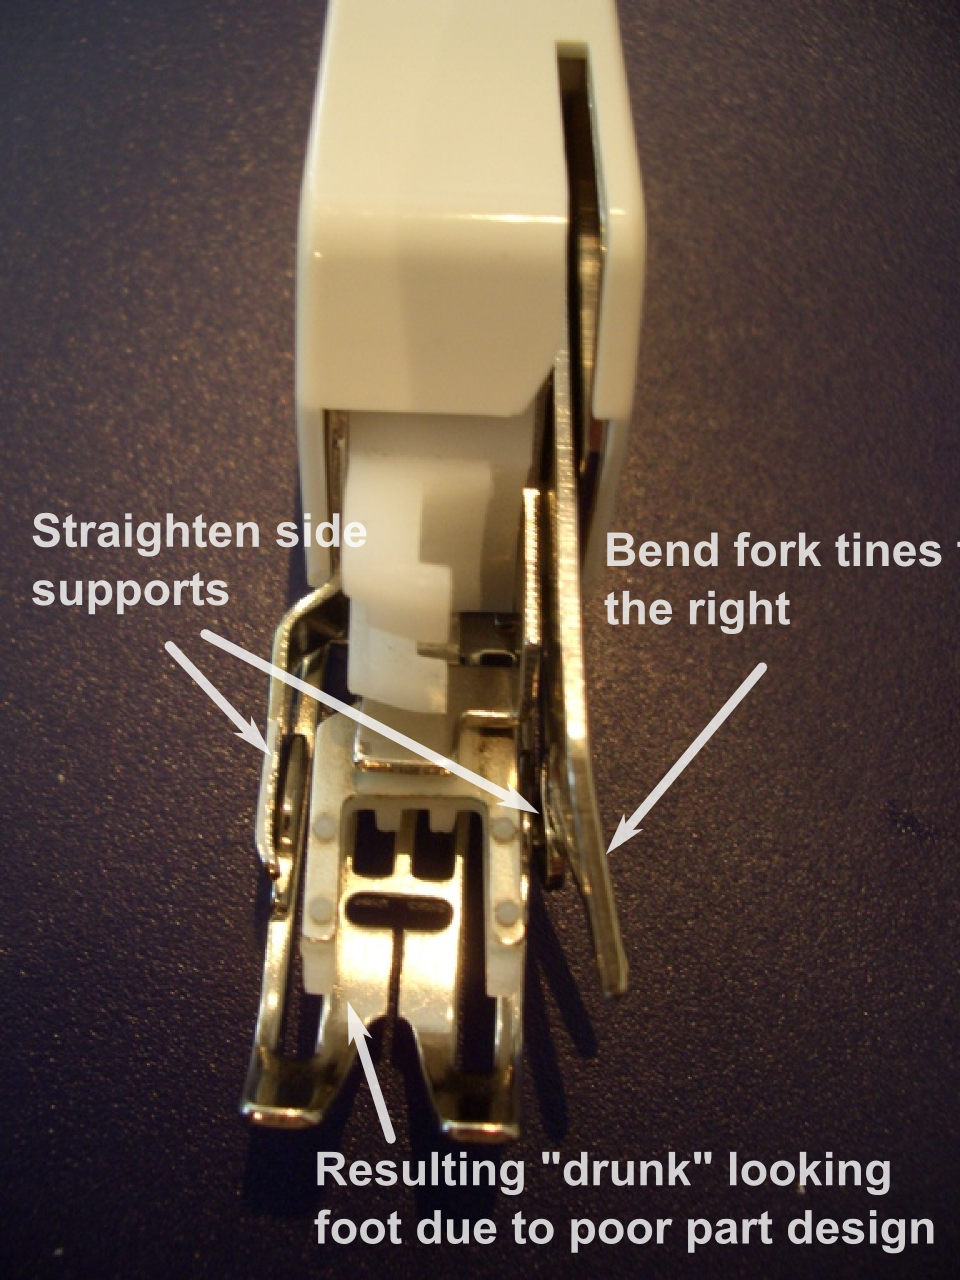 |
| The fork tines of this foot used to actually be straight. Now I have bent them: hooray for pliers. |
Secondly, the position of the metal part of the foot was too far to the right relative to the whole apparatus, because the supporting metal bits were bent all wonky. Fortunately, the whole foot is simple to disassemble (only two screws) and you can get the metal sides out on their own. Then you use your trusty pliers to bend them to the correct shape. (Like I said, the foot is cheap, the metal is flexy.)
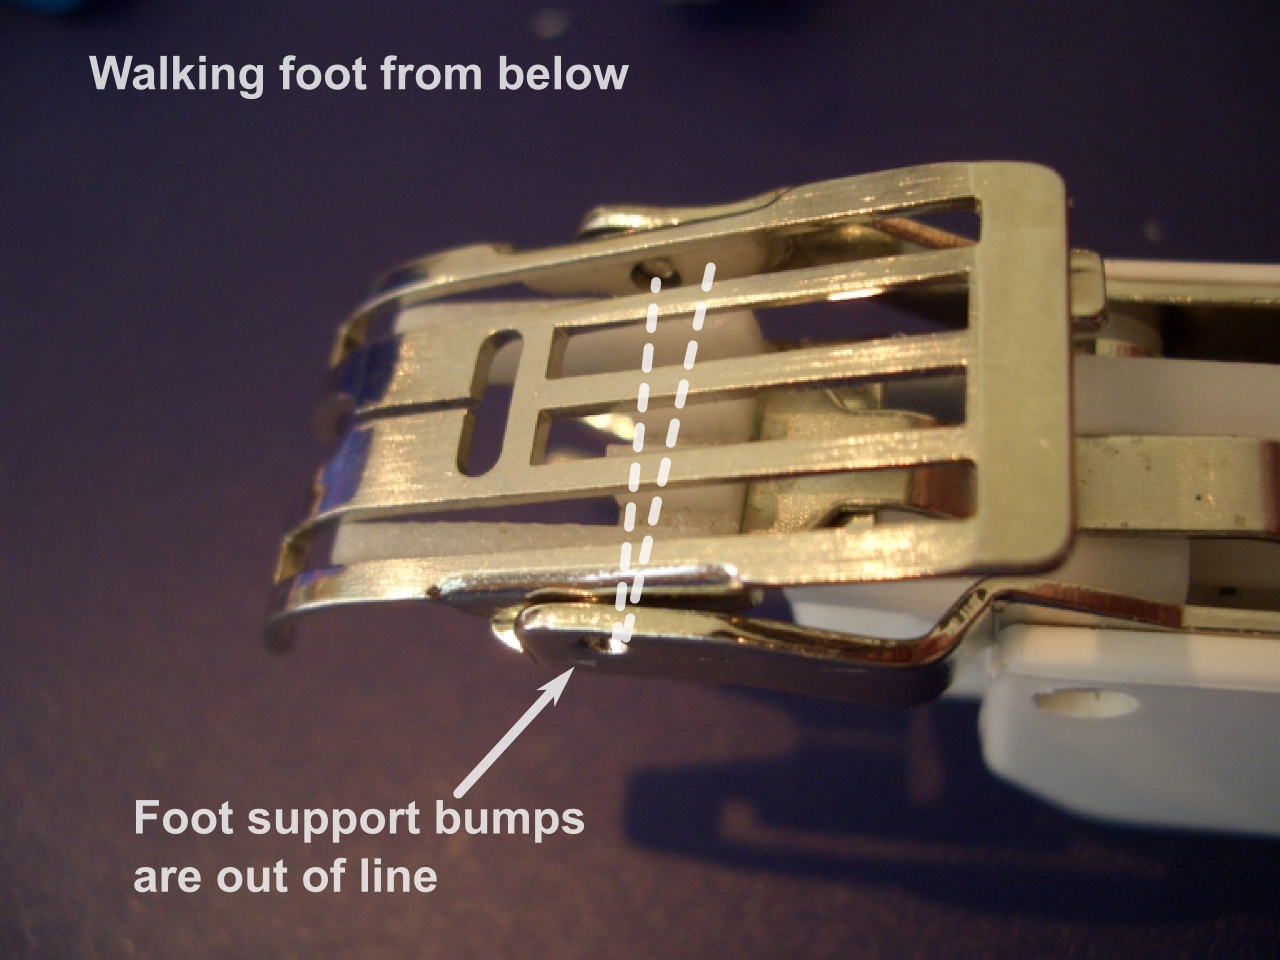
 |
| The horizontal lines of metal you see are actually plates extending the whole length of the foot. I bent them straighter near where they support the metal foot. |
The sad up-shot of this is that the metal foot is now at a jaunty angle because the designers have placed the molded bumps that hold the foot in the wrong places relative to each other. However, there's enough play in the plastic walky bit that the foot still works, and my bodges have worked enough to move the hole in the foot back to the centre of the needle bed. I can fix the hole later when my new needle files arrive - I'll file the screw holes into slots on one side in order to move the metal sides into alignment. Then my foot will look sober again. Meanwhile, it works and I can sew!
 |
| The metal foot is all wonky when correctly assembled because the parts have been manufactured wrong. Boo hoo hoo. |
No comments:
Post a Comment